
Ice Dyeing.
“So, dyeing with ice?”
Correct.
Ice dyeing which yes, is a derivative of tie-dyeing has raised the stakes.
But before we delve into the world of current day “Insta Baddies,” modeling ice dyed apparel, I find it important to step onto the roller coaster of time and travel alongside tie–dye.
Now, there’s a vast history not only on the evolution of tie-dye, but on how what it represented culturally shifted. After what seemed to be long hours of reading graphs and numerous timelines, I have found all of this to be boiled down into four main sections.
The first big BOOM of tie-dye was in the mid 60s’. Don Price, a marketer for RIT, had the idea to change their popular color dye formula from a powder substance to a liquid in a squeezy bottle. The notion behind this was liquid allowed for a more efficient tie-dye process. With this “new and improved,” formula they financed artists to make thousands of tie-dye shirts and sell at Woodstock.
From good vibes and peace signs to high fashion runways tie-dye was transforming. Halston, a Fashion Designer, styled model Marisa Berenson in a tie-dye garment in Vogue. Concurrently, Ali McGraw was spotted rocking a similar garment down Fifth Avenue.
Now we’ve fast forwarded and have come to the era of suburbia. Simply put tie-dye was now used to speak “I’m a cool kid.” This was done by suburban parents dressing their children in neon tie-dye. If you’ve ever seen the infamous photo of Chelsea Clinton riding her bike, that is exactly what I’m talking about.
This kind of brings us to present day, and immediately I think of is Bella Mal wearing an amethyst ice dyed shirt. But, she’s not alone. Other “celebs,” has been spotted with the trend such as Paris Jackson, Justin Bieber and even Beyoncé who wore an ice dyed mini dress on a yacht in Italy.
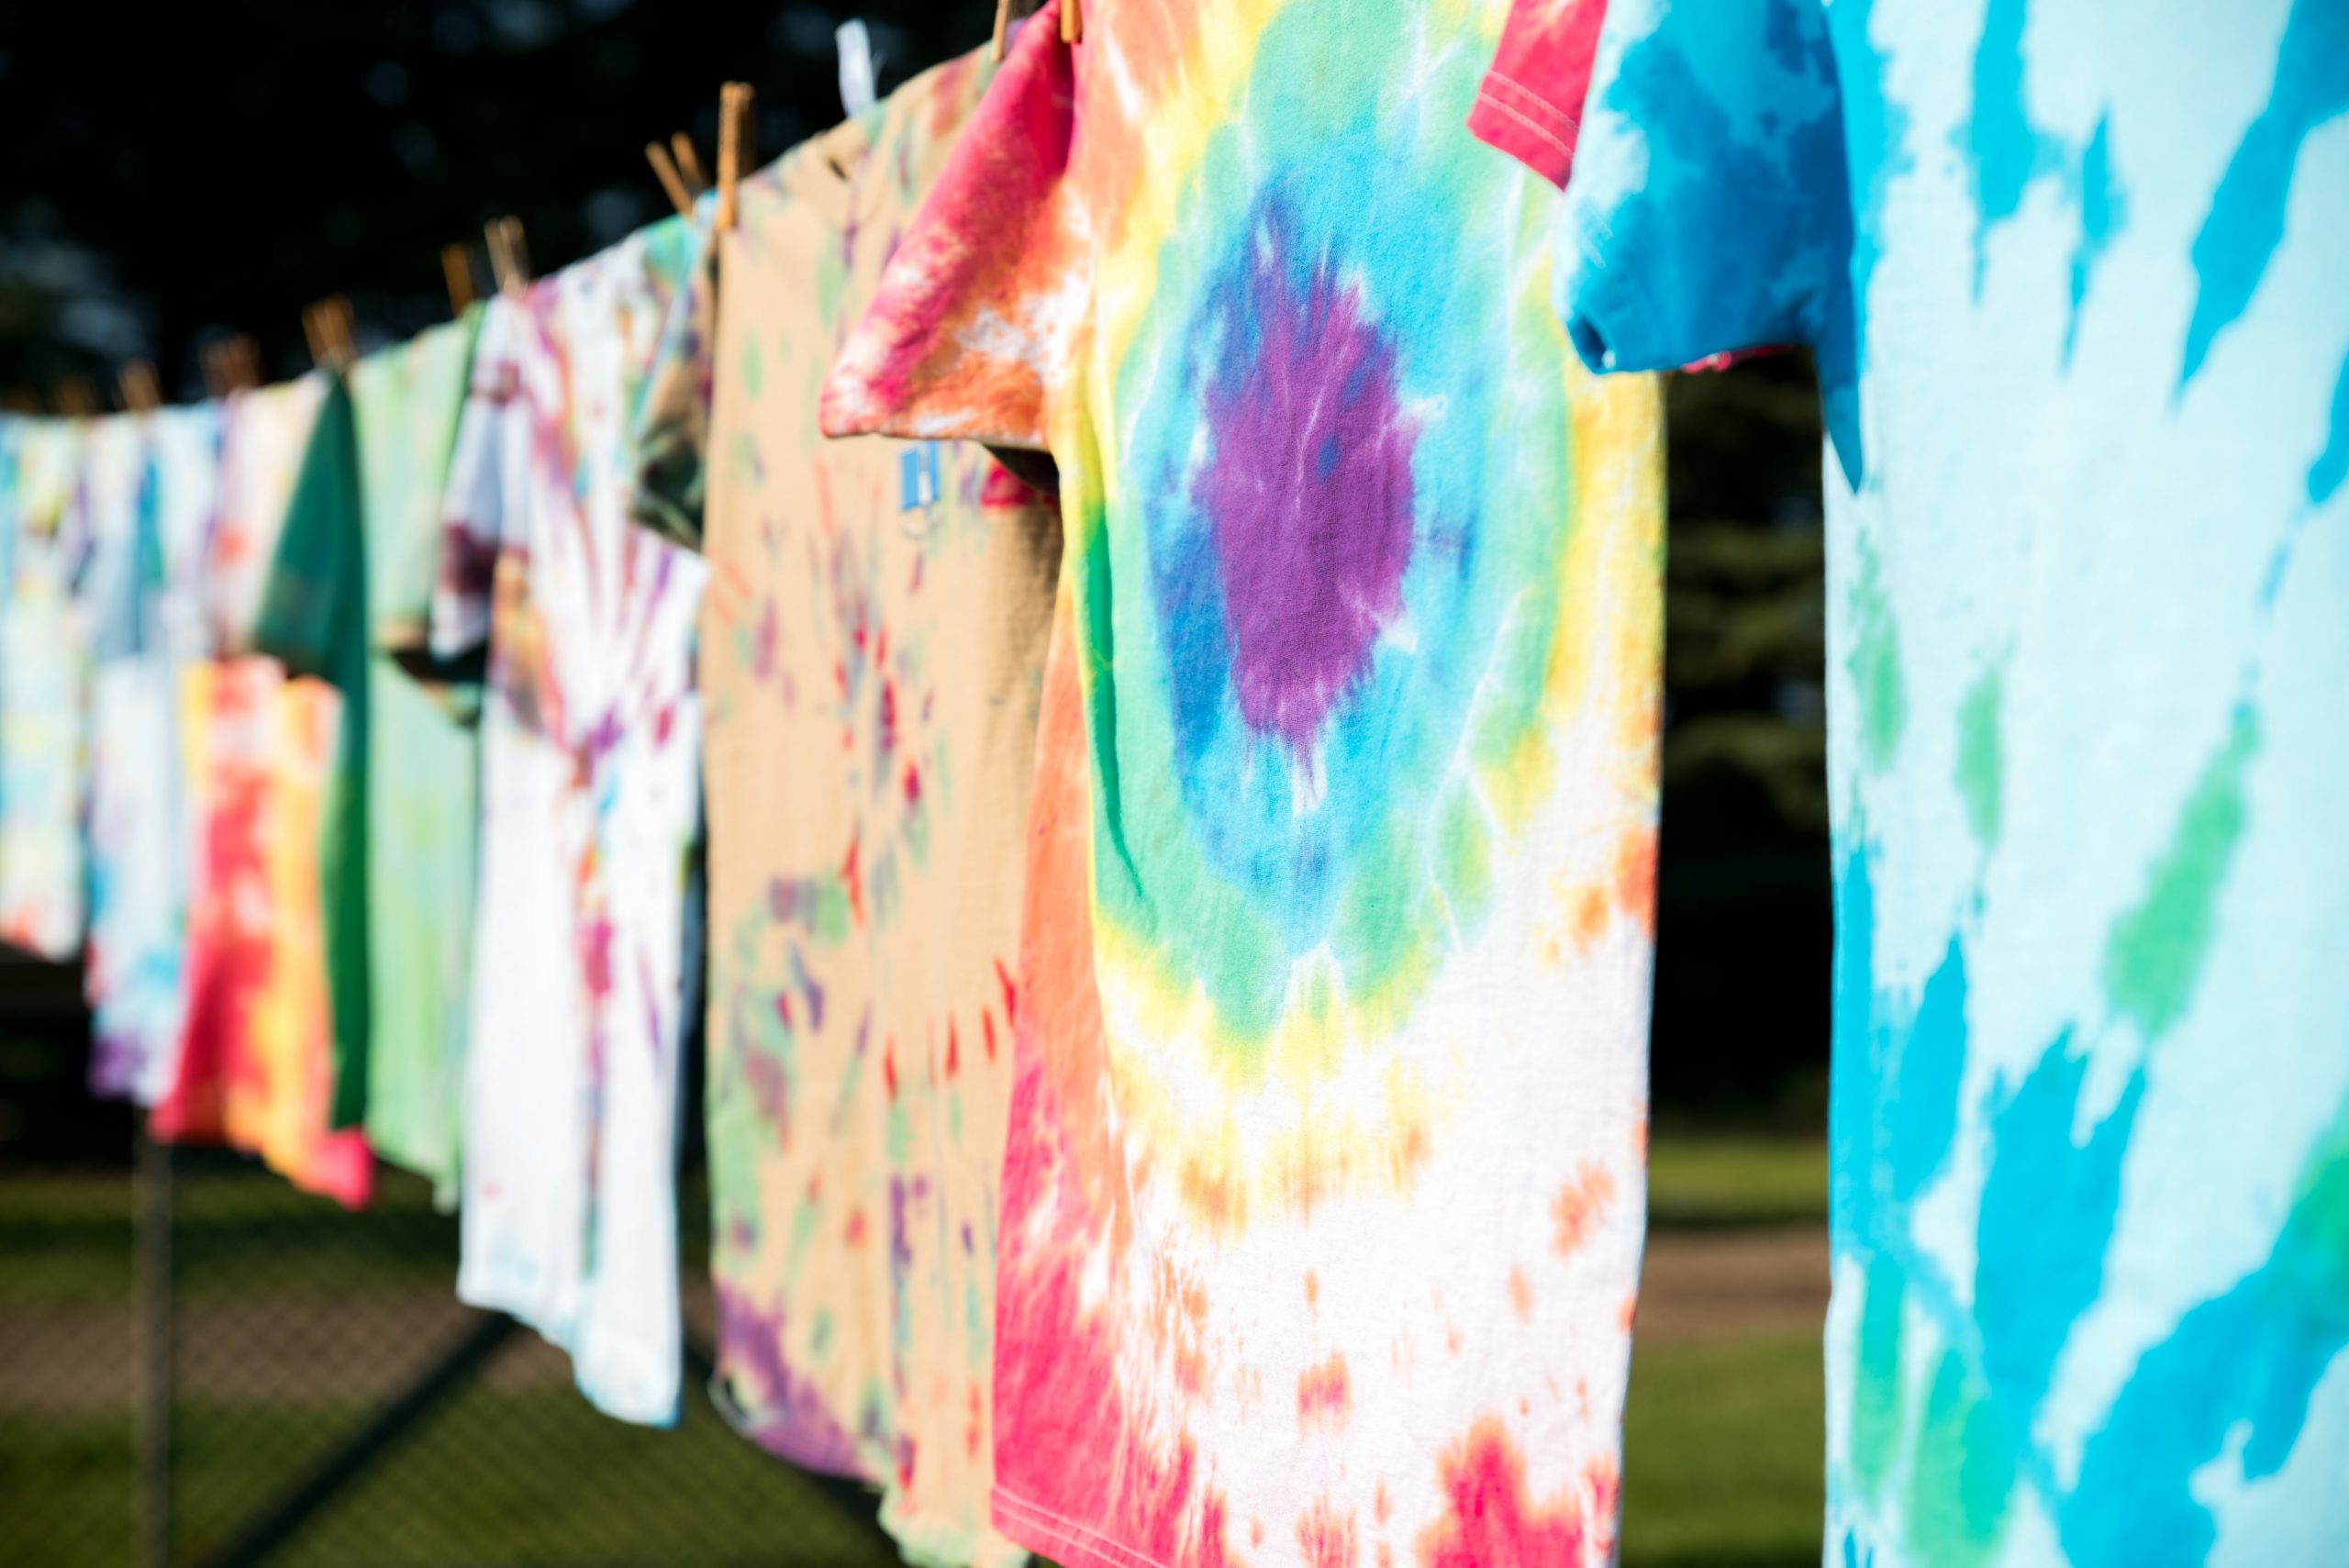
If you’re asking yourself if you should take the term iced dyed literally, you should. To make this mottled watercolor effect you can simply use the ice out of your freezer. This is actually a modern day adaptation that is user friendly, and here’s why.
The origin of this technique traces back (long before you and I) to quilters who were stumped with the question of how to dye their fabric during the winter months. Low and behold, they realized they could use the winter to their advantage and dye their fabrics with snow.
Using myself as a prime example, I am currently composing this piece in the glorious sunshine state otherwise known as Florida. Where 365 days a year there is no snow. Therefore, this process would be impossible for me to replicate. Luckily ice and snow are interchangeable, so it can easily be a replacement. Which helps out a girl down here!
all about that dye
With this technique the vital part is the dye. When I was first introduced to this my initial thought was to run to the store and pickup liquid dye and just go to town on a shirt. Thankfully, I did my due diligence and realized how wrong I was.
Liquid dye just won’t cut it. Instead, you should seek out a fiber reactive dye. And for anyone wondering yes, powder dyes still do exist. Shocking, I know right.
A quick fun fact, that type of dye was originally called “Procion MX,” which was a brand. Over time this has adapted and now various manufacturers produce it.
With these dyes it’s important to know a little bit about the science behind them, so when you go to ice dye you can achieve the ideal look you’re envisioning in your head. Personally, I think it’s frustrating when you have a vision and act upon it, only to be left disappointed and annoyed by your end result. Typically, this is because you didn’t have that “a ha,” moment prior, so we are going to accomplish that now.
First it’s important to note that these are color fast meaning they are cold water dyes. They are categorized by pure color and mixed color dyes. For the most part this is pretty much as it seems. It boils down to the granules of dye that make up each. In a pure color every granule of dye is the exact same. While a mixed color is composed of varying pure colors, therefore different colored granules. With a mixed color dye you have a little less control, but that can be a good or bad thing depending on the specific look you’re aspiring for. The main aspect I want to call attention to is that when you sprinkle this dye the result will be one of two outcomes. Either you’ll be left with a mixture of varying colors in one spot or sporadic sprinkles of pure colors throughout.
When these granules of fibers touch the fabric it reacts to the fibers present, hence their name. What’s the breakdown of this you might be questioning well ….
As soon as the colored dye interacts with pretreated fabric instantaneously it bonds to it. These two items, being the dye and fabric, merge and become one on a molecular level. It is due to this that you are left with a mottled watercolor effect on your fabric.
So …. let’s get to it!
- To begin you’ll want to wash your selected garment with a textile detergent in a dish pan. This is going to remove anything and everything that lays on the surface of your garment.
- Add in soda ash and stir continuously until it’s completely dissolved. This will further help the color dye stick to your garment. Add in your garment, and stir. Ring out when done.
- Grab your dish pan and place a metal rack on top of it. Place your washed garment on top of the metal rack and do the “scrunch and brunch.” Once that is at your satisfaction cover with ice. *Keep in mind no ice, no color.
- The fun part! Add your color.
- Now you wait. Depending on when and where you do this it can take up to 24 hours for the ice completely to melt.
- When the ice has dissolved, rinse out your garment until you no longer see any color running off of it. Wash again with your textile detergent. Put in the dryer if desired.
At this point you could say that you’re finished. You have an item that is ice dyed and ready to be rocked. Or is it? For me that is a hard no. Because ..
it’s time to crystalize
This is where I love to personalize the heck out of my clothes and I do this with none of than my Swarovski crystals! Everything needs a little bling … or a lot if you’re like myself!
The best crystals to use for this are the Swarovski flatbacks with the Crystal Glue Pen.
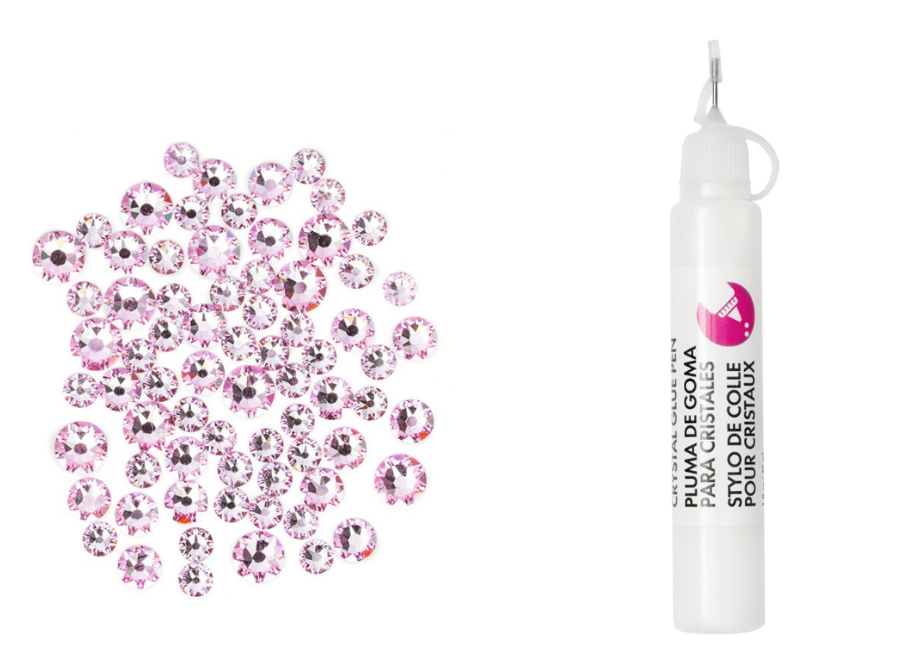
BONUS TIP: trust me when I say you’ll want to pick up a CRYSTAL KATANA while you’re at it. You’re welcome, because you’ll be thanking me later.
Here this is simple. All you do is select the crystals you want to use and add them on. Use the rubberized end of your Katana to pick up your crystals and figure out what pattern or word you’d like to spell out. Once you’re ready, grab your glue pen and just start gluing the crystals to your garment!
It really is that simple.
Well that all I got for ya today. Now you truly will be sporting one-of-a-kind clothing.
Stay warm (haha get it …) uh I crack myself up ?
Good luck, happy dying!